Contents
- ane Strut A, Deep Sea Dock
- 2 Strut A, Roof
- three Strut A, Pump Room
- 4 A-B Connecting Bridge
- v Strut B, Transformer Room
- 6 B-C Connecting Bridge
- seven Strut C, Dining Hall
- eight C-D Connecting Bridge
- 9 Strut D, Sediment Pool
- ten D-E Connecting Bridge
- eleven Strut E, Parcel Room, 1F
- 12 Strut E, Heliport
- 13 E-F Connecting Bridge
- xiv Strut F, Warehouse
- 15 F-A Connecting Bridge
- xvi Strut A, Pump Room
- 17 A-B Connecting Bridge
- 18 Strut B, Transformer Room
- 19 Strut C, Dining Hall
- 20 Dominate: FORTUNE
- 21 Strut A, Roof
- 22 Strut E, Heliport
- 23 BOSS: FATMAN
- 24 Strut E, Heliport
- 25 Strut E, Parcel Room 1F
- 26 E-F Connecting Bridge
- 27 Strut F, Warehouse
- 28 East-F Connecting Bridge
- 29 Trounce ane Core, 1F
- thirty Shell 1 Cadre, B2: Computer Room
- 31 Shell 1 Core, B1
- 32 Shell 1 Cadre, 1F
- 33 Eastward-F Connecting Bridge
- 34 Strut F, Warehouse
- 35 Strut D, Sediment Puddle
- 36 Crush one-2 Connecting Bridge
- 37 BOSS: HARRIER
- 38 L-One thousand Connecting Bridge
- 39 Strut 50, Perimeter
- twoscore K-L Connecting Span
- 41 Beat out ii Core 1F, Air Purification Room
- 42 Beat 2 Core B1, Filtration Chamber No. 1
- 43 Shell 2 Core 1F, Air Purification Room
- 44 Vanquish two Cadre B1, Filtration Chamber No. one
- 45 BOSS: VAMP
- 46 Crush 2 Core 1F, Air Purification Room
- 47 K-L Connecting Bridge
- 48 Strut 50, Sewage Treatment Facility
- 49 Strut 50, Oil Contend
- 50 Strut E, Fabric Distribution Facility
- 51 E-F Connecting Bridge
- 52 Shell i Core, 1F
- 53 Armory Gear, Stomach
- 54 Armory Gear, Jejunum
- 55 Arsenal Gear, Ascending Colon
- 56 Arsenal Gear, Ileum
- 57 Arsenal Gear, Sigmoid Colon
- 58 Armory Gear, Rectum
- 59 Boss: Metallic GEAR RAYS
- sixty Federal Hall
- 61 FINAL Dominate: SOLIDUS SNAKE
Strut A, Deep Sea Dock
When you commencement at the Deep Ocean Dock, the showtime thing you'll desire to do is to jump into the water and swim to the bottom to find the THERMAL GOGGLES, its on the right side of the pool, on the wall, and is quite easy to miss. The second matter you should practice in this room is to flip over the railing and climb by the chain link argue, then jump support and pick up the SHAVER (the SHAVER just appears when playing on difficulty level Hard or above). If you get information technology, Raiden will requite it to Snake when you lot meet him and later in the game he volition have shaved his stubble. Then equip the THERMAL GOGGLES and you should see a red rotating block on the bottom of bunch of shelves (very easy mode, it will be on the other side of the chain link fence on like shooting fish in a barrel mode, it will non appear in whatever other mode). Clamber to selection it up. It is an M9. And so, go up the steps and open the middle locker to detect a RATION. Open the door and listen to the CODEC conversation. Then get down the corridor and enter the room. Walk over the KO-ed guards, if you have the M9, tranquilize them. Log into the Node, which looks like a computer. Once y'all've finished entering your details, the guards will start to wake upwardly if you didn't tranquilize them, and then hurry and hide somewhere, and when the elevator comes down, go on it.
Strut A, Roof
Option upwardly the BANDAGE and get over to the concatenation link argue in the upper left hand corner. Crawl through the hole in the fence and get through the nearby door to the south.
Strut A, Pump Room
Become downwards the stairs and watch the cutting-scene that shows you where the Node is. Knock on the wall to distract the guard, sneak by him and go and log in at the Node. If you like, you can tranquilize him or merely impale him by snapping his neck. When you're done, leave through the door on the left. Don't forget to check the lockers wherever y'all go.
A-B Connecting Bridge
After watching the cutscene, you tin can do 4 things:
- Practise what the Colonel said. Simply hang over either railing and shimy beyond to the other side.
- Agree up ane of the guards, and then kill either i.
- Tranquilize both of them when the opportunity arises.
- If you're looking for a thrill, tap on the wall when one of the guards are most you and press Square with no weapons equipped and put him in a chokehold. Tap Foursquare repeatedly when yous have him in the concord. Then do the aforementioned affair to the other guard.
- Hunker behind the railing on either the left or right side, depending on which guard you lot wish to take out. Look until ane of their patrol routes brings them right upward to the stop of the walkway their on, facing you. Once they plough around, stand upwards and begin following them. One time you attain the portions of the walkway with pannels that volition brand noise whenever y'all walk on them, you lot'll want to cartwheel over each of them. After yous've reached the guard, he'll be facing away from you. If done correctly this gives yous an oportunity to put him into a chokehold and accept him out.
There is a RATION in this rectangular area in front end of you when you are on the bridge.
Strut B, Transformer Room
Walk forward and watch the very long cut-scene. When it'southward over log on to the node, get the SOCOM bullets next to the node, go up the stairs to choice up the SOCOM SPPR (very easy mode only, can be found in Strut F on any other difficulty). Then get through the door at the other end of the room.
B-C Connecting Bridge
Watch another cutting-scene so cross the bridge. You can selection upwardly the CHAFF GRENADES on the remaining stub of the bridge (watch out, y'all tin fall downwardly easily here) that connects Struts B and C to the Shell 1 Core. Y'all should go out the area ASAP, as a Cipher drone will evidence upwardly if yous are even so at the bridges for a certain amount of fourth dimension.
Strut C, Dining Hall
Walk downward the corridor and a cut-scene will start. You'll receive the COOLANT SPRAY, SENSOR A and a LEVEL 1 CARD Key. Once the cut-scene is over, get to the other finish of the room and log in at the Node. Take the RATION under the tabular array and then leave the room and go back down the corridor and go into the toilets on the right. Arroyo the mirror, equip the COOLANT SPRAY, look upward into the right-paw corner and spray the bomb until it is defused, cheque all the cubicles for items, there should be SOCOM AMMO, PENTAMAZIN and M9 AMMO. The flop tin exist tricky to see, here'due south a video to its location. Leave the toilets and become support the corridor and leave through the door at the other end.
C-D Connecting Bridge
Run across the bridge, but be cautious every bit there is a security camera, shoot it or use a Crust GRENADE. Enter the door into the next area.
You can also hug the wall and go past.
Strut D, Sediment Pool
Go down the steps, shoot the guard and toss him in the water (there are a few places where you lot tin do that). Avoid doing so if yous can, as HQ will send an attack team if the guard on the lower level doesn't report to HQ. Now go down the next set of stairs and round to the Node. Log in so go all the mode round the other side. Open the hatch to find the bomb and utilise the COOLANT SPRAY on it, on the hard style there will be two bombs, the second is under the hatch at the bottom of the stairs. One time they're defused, go dorsum up the stairs, round to the right and through the door.
D-Eastward Connecting Bridge
Get down the stairs to the lower level of the bridge to avoid the guard looking downwards from the opposite roof. Cross the span, selection up the STUN GRENADES and SOCOM AMMO, then get upward the stairs and through the door that leads into the next area.
Strut E, Parcel Room, 1F
Crawl beyond the room to reach the Node in the top correct corner and log in, pick up the AMMO nether the shelves before the node. Now carefully head towards the stairs on the left side of the room and go downwardly them to pick upwardly the MINE DETECTOR. Head back up the stairs and go to the opposite side of the room where you will find some stairs - become up these and get through the door. If you are playing on hard mode there will be a bomb on one of the boxes in circulation on the conveyor belt, stand in any area with the COOLANT equipped and spray it every bit shortly as you see it.
- Shortcut: Getting the Digital Camera
If you go to the loading surface area for the boxes (located at the s-most area in the room. It has 3 lights on it), climb on information technology and put box five on (You find it at the north area of the room). The light will change to orange and and then blue. And then walk onto the chugalug and it will take yous to another area in Strut E. In there you lot will find the Digital Camera. You tin can get out the way you lot came in. Whatever other box you notice will take you to a different strut like...
- Box 1 will take you to Strut C
- Box 2 will accept you to Strut B
- Box 3 volition accept you to Strut A
- Box four will take you lot to Strut F
Strut East, Heliport
Walk forrard and effectually the corner to sentry a cut-scene. Go up the large flight of stairs onto the heliport. Go upwardly to the Harrier jet and clamber nether the landing gear to observe the next bomb. Freeze information technology with the COOLANT SPRAY. Caput back downward the stairs and through the door back into the Parcel Room. Then go through the Southeast door at the bottom, which will lead you through a brusk corridor that brings y'all outside.
Eastward-F Connecting Bridge
Wait out for the Gun CYPHERS on this span and actuate the MINE DETECTOR. Before you lot get too far across, plough effectually, wait upward and shoot the guard looking down earlier he spots you. Crawl along the ground to selection up the Claymores earlier going through the door at the other terminate. If the Cyphers are getting on your nerves, shoot them (you tin go them with ane shot, if you striking the lower part) or apply a CHAFF GRENADE to jam their electronics. Unfortunately this makes your MINE DETECTOR useless. To go effectually this, simply clamber the entire length of the bridge and any mines you encounter will automatically be picked upwardly. Easy!
Strut F, Warehouse
Look out for the baby-sit and get round the corner to the left. Y'all tin see the room below - behind the crates on the left is the next C4 flop. Flip over the rails to a higher place the bomb and drib downwards betwixt the crates. Now utilise the COOLANT SPRAY on information technology then climb out of the stack of crates. Become down the corridor and into the small-scale room on the left to find a Node. Log in. After that await behind you. At that place volition be a ventilation duct. Clamber through that until you reach another room. In that room will be the SOCOM SPPR if you don't have it already. Make sure yous don't go straight to the left after exiting the crate heap, or you volition find yourself on the F-A CONNECTING Span, simply at that place is something we need to do first. Anyway, later logging in, pick up the items in the Warehouse. Make sure you visit the upstairs section and search the rooms for the M9 if you lot don't have it yet. Afterwards picking up the tranquillizer, become through either door on the left (i upstairs and i downstairs) into the next department.
F-A Connecting Bridge
Now that we're here, cantankerous the bridge chop-chop, shooting both the Nada and the guard on the mode. Be sure to pick upwardly the CHAFF GRENADES, STUN GRENADES, and SOCOM BULLET x12 along the way if you demand it.
Strut A, Pump Room
One time back in hither again, caput towards the bottom of the screen and enter the next room. Go down the right-manus side and go over the pocket-size flying of steps adjacent to the pipes. Crawl left under the pipes. When you reach a red pipe, clamber down, following the ruddy pipe. Hither yous will discover the next flop, so use the COOLANT SPRAY on it (video walkthrough to the location). In one case yous've frozen information technology, watch the Codec conversation. Once it has finished, get out the room and go through the acme-left hand door onto the A-B CONNECTING Bridge.
A-B Connecting Bridge
Apace shoot the guards with your M9. Be certain to shoot them in the caput, and make sure yous take them both out before you lot get spotted. Get through the door at the end.
Strut B, Transformer Room
Head downwards the corridor and into the room where yous first met Pliskin. Head to the top of the room nearly the door and examine the fuse box. You will observe that i of the doors is up against the wall next to the door. Give it a good kick so information technology volition fall down, or just close it to reveal the side by side C4 bomb (video walkthrough to this location). In one case over again, employ the COOLANT SPRAY on it. After the Codec conversation, head by the next area (B-C CONNECTING BRIDGE) and enter STRUT C, DINING HALL.
Strut C, Dining Hall
Caput into the room where you met Peter Stillman and go into the pantry he was hiding in to find SENSOR B. Later on the Codec conversation, you will take 400 seconds to caput over to STRUT A, DEEP Sea DOCK. If yous've forgotten how to go in that location, run back to STRUT A, PUMP ROOM and go up the stairs onto STRUT A, ROOF. Get on the elevator and you lot will be taken down to STRUT A, DEEP SEA DOCK. Run through the storage room into the very first room yous started in (the one where you establish the SHAVER). Try and be very quick getting at that place, because if you don't make it, you'll exist sleeping with the fishes. In other words, game over, yous're expressionless! Once in that location, look under the mini-sub above the puddle of water to find the bomb, so use the COOLANT SPRAY on it, on very easy mode, you can effort spraying it from the south side of the pool, while crouching, or from the north side of the puddle, jump over the railing to hang and shimmy to the east, then bound support to get the to the small muzzle with the swoop suits and a pedestal, crouch from the pedestal to reach the bomb, be conscientious non to fall over the puddle. Once the Codec conversation is over, head into the storage room (the one with the first Node) for your second Boss fight against Fortune.
Dominate: FORTUNE
Raiden Vs. Fortune
This is a strange fight, as Fortune can't be killed, so all yous have to do is survive. She'll burn down her railgun in your direction that will destroy any you happen to be hiding behind, so keep moving at all times. Try to go along out of Fortune'southward vision equally much every bit you can, and NEVER STAND However. In that location is some SOCOM AMMO dotted about to try and lure you lot into Fortune's vision, and so just ignore them equally you'll just get blown to bits. Once you go a Codec call from the Colonel about Fatman, then the fight will be over. You can pick upwardly the SOCOM ammo after the battle if you similar.
Strut A, Roof
In one case the cutting-scene is over and yous're on the roof, yous will accept another 400 seconds to attain STRUT Due east, HELIPORT. Earlier y'all move, however, equip your MINE DETECTOR equally mines have been placed on the roof. Make your way chop-chop to STRUT Due east (press START to bring upwards the map screen if you get lost.
Strut E, Heliport
Once you lot get upward here past going through the Parcel Room, head up to the Heliport past going upwards the stairs. Selection upward the SOCOM AMMO and approach the bomb in the centre of the Heliport and use the COOLANT SPRAY on it. You lot will now be thrown into your next Boss fight with Fatman.
BOSS: FATMAN
Fatman will randomly identify a few C4 bombs around the roof and you must use SENSOR A to find them and use the COOLANT SPRAY to defuse them earlier the time runs out, so keep on your toes. Once you've finished with the bombs, follow Fatman around. When he stops for a breather, or any fourth dimension just shoot him a few times until he falls over. One time he's on the floor, equally soon every bit you encounter him kickoff getting up shoot him in the head thus giving yous much more fourth dimension. If y'all're quick yous may be able to become more than i shot in. When he gets up, he'll skate off and establish some more than bombs - so be alert. He will occasionally pull out a gun and shoot at you, so have your RATIONS ready. Fatman likes to put bombs under the aircraft containers, besides on top of the aircraft containers and on the back where you lot cannot run across them without beingness in starting time person. ( If you punch him [until he falls down] when he is placing bombs; he volition stop at i and identify NO MORE. This is specially useful when playing on hard or extreme.) Besides, y'all can place some claymores on the flooring, so the explosion gets Fatman off his toes and you lot can assail.
Keep doing this over and over until he runs out of life, a cut-scene volition start. One time the cut-scene is over, you volition realize that in that location is one more bomb to defuse. This bomb will be under Fatman. To detect it, simply elevate Fatman's body away from the bomb. When his body drops, Peter Stillman's Dog Tag will drop. Fatman can simply be dragged to a certain distance from the flop. Once yous've found the bomb, freeze information technology and watch the codec chat. .
Strut E, Heliport
Head towards the stairs and a cut-scene will starting time in which yous meet the mysterious Ninja, Mr. X. He'll give you a LEVEL 2 CARD KEY, B.D.U., and a CELL PHONE. Once the cut-scene is over, head back to the Packet Room.
Strut Due east, Parcel Room 1F
Avoid the guards and head through the door at the bottom onto the E-F CONNECTING BRIDGE.
E-F Connecting Bridge
Avert or shoot the abrasive Cyphers and go through the door on the other side of the bridge.
Strut F, Warehouse
In that location are now three rooms in here that you can access using the LEVEL 2 CARD KEY, two on the upper level and one on the lower level. Caput round the corner to the first room and collect the C4 and CLAYMORES from inside. Now get out the room and head over to the left to discover the other room which contains the M4, M4 AMMO and PSG1 AMMO (hidden in duct on the left side of the room - you lot won't be able to get this yet). Be aware that there are Semtex explosives in the room. The control unit for thr IR sensor will be on top of the locker closest to the door. Alternatively, it is possible to crawl under the IR beams (use the cigarettes or burn extinguisher equally a guide) . Head downstairs via the upper right stairwell, and into the northeastern most door on the bottom floor. Inside this room you'll find the AKS-74u, AKS-74u AMMO, SOCOM AMMO and M4 AMMO. Now go dorsum upstairs and through the door to the bridge.
Eastward-F Connecting Bridge
Again, look out for the Gun Cyphers and when you're halfway across go left towards the core. The bridge panels will fall when you are on them, but as long equally you are running, y'all're rubber. If you desire to leave the span intact, then you can lean on the railing and either shimmy beyond on the bridge or shimmy beyond beneath the railing. Caution! If you move slowly through the bridge, the Cyphers coming from South- and Due north-Westward might meet y'all, and if they shoot you lot, you might fall through a trapdoor. If you need to, choice up the AKS-74u AMMO near the entrance. You tin equip the B.D.U and AKS-74u now if you like, but this is optional.
Beat out 1 Cadre, 1F
One time inside, you should equip your B.D.U and AKS-74u so you don't have to worry almost the camera that's in front of the door. When y'all have left the corridor, become to the room south of you. There volition exist a node you can log in from there. Some C4, M9 AMMO, Chaff GRENADES, and a BOOK will be in that room as well. In one case you are done with logging in and scavenging for items, get out the room via the door the your left. Subsequently you accept left the room, y'all'll be on the left hand side of 1F. At the midpoint of the straightaway, there will be the door to the B-C Connecting bridge. You lot won't be able to become to the B-C Connecting span from there since the door is shut downwards. There will be some SOCOM AMMO there if yous need it. Once you have passed the entrance/exit to the B-C Connecting bridge, head towards the elevator. You'll be okay if you all the same have the B.D.U and AKS-74u equipped, every bit the camera will give you access to the elevator. Once inside the elevator, press the push button 'B2'.
Shell one Core, B2: Computer Room
Head through one of the doors and down to the estimator room. Starting time log into the Node in the top right-hand corner of the room and choice upwardly BOX 4, AKS-74u AMMO and the DIRECTIONAL MICROPHONE over on the left and the Cast from beneath the desk. Y'all tin also become a lot of BOOKS from the lockers on the left side of the surface area, just kick the leftmost locker with the BOOKS on top of information technology and they volition drib down. Collect these every bit they volition be important for subsequently on. Now return to the elevator and press the push button to go to B1.
Shell one Core, B1
Head right into the small room and log into the Node. Exit the room, catch the patrolling guard from behind and drag him over to the retinal scanner. Spotter the cutting-scene and you'll find yourself in the hall where the hostages are being held. Get downstairs and search for Ames using the DIRECTIONAL MICROPHONE to listen for his pacemaker, which makes a beeping sound to back-trail his heartbeat. He usually has near-shoulder length chocolate-brown hair. Once you notice him press TRIANGLE to talk to him and watch the cut-scene, during which Ames will give you a LEVEL iii Carte du jour Central. When it's over you'll have ten seconds to equip your AKS-74u (if you lot get out your M9 and try and take Ocelot's dog tags, it will non work) earlier Ocelot arrives, but don't movement anywhere or else you'll be discovered. Another cut-scene will starting time and when it's over you lot'll be back in the corridor, minus your balaclava, so the guards will shoot you on sight. Head back to the elevator and go to 1F.
Shell i Core, 1F
Shoot or avoid the guards and cameras and head back out to the bridge.
Eastward-F Connecting Bridge
Cross the span, which will partially collapse over again and caput downwardly to STRUT F outset (you lot get the LEVEL 3 CARD KEY from Ames) In that strut search the peak floor for LEVEL three rooms. Search everywhere and you will find the PSG1 and the RGB6, with additional ammo for both.
Strut F, Warehouse
You can at present gain admission to the 3 remaining rooms upstairs in this expanse. In them you'll discover the PSG1 and RGB6 forth with ammo for them. The PSG1-T is in the vent in the same room as the standard PSG1 (normal difficulty or below). Once y'all've picked them all up caput back out to the bridge and head to STRUT D.
Strut D, Sediment Pool
Go downward the stairs and through the door at the top-center.
Beat out i-2 Connecting Span
The whole bridge is covered in Semtex bombs. Accept out your PSG1 and shoot the control units to disable them. Use some PENTAZEMIN if you need information technology. The control units are located as follows:
- In a higher place the door behind yous.
- Two at the lesser of the stairs in forepart of y'all.
- On the tank on the bridge.
- On the left side of the door opposite.
- On the right side of the door reverse.
- Behind the flag on the left.
- On the Zippo flight over Shell 2. (DON'T shoot the Null before destroying information technology'southward control unit or you'll have to commencement once more.)
- On the left side of the bridge.
- On the ledge beneath and to the correct of the bridge.
In the Tanker Affiliate there is the part where you have to accept out 3 IR Sensors for the Semtex, in that location is a twist this time. You tin't motion ahead as you accept out the first 1. To movement alee, you take to accept out all of the sensors.
On very easy they were plant to be as follows:
- One at the bottom of the stairs in front of you.
- On the tank on the span.
- On the left side of the door reverse.
- On the Cypher flying over Beat out 2.
- On the left side of the bridge.
One time they're all disabled, walk forward and a cut-scene volition start. When information technology ends, get ready for a tough Boss fight.
Dominate: HARRIER
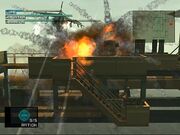
Raiden Vs. Harrier
Take hold of the STINGER and STINGER MISSILES then aim for the Harrier and let off a couple of rockets. The Harrier volition fly off for brief periods and so come back with all guns blazing or exercise a wing-by (open up for an attack), the force of which volition knock you downwards. It as well attacks you with missiles and a mini-gun which both need to exist avoided to escape serious harm. There is more cover on the lower level of the bridge, but it so makes the Harrier harder to striking. Keep hitting it with rockets until it goes down. Pliskin will throw downward some RATIONS and more missiles when you need them. Always make sure you are aiming at the Harrier, so you do not mistake it for the Kasatka (yeah, information technology happens; the game is over if you destroy the Kasatka) and, if you take the time, and skills to survive, switch weapons and so Pliskin gives you ammo for free. When you lot see the cutscene of the Harrier about to blow up the bridge, hang over the correct railing and y'all won't receive any damage. You tin too hang on the eye rails and right as the airstrike is nearly to blow everything upwards you jump back over and you won't receive impairment.
At that place is a RATION on the stairs to the lower part of the connecting span, only information technology is not a skillful idea to become information technology since the stairs fall off. The bridge is at present destroyed so walk towards the rail on the right. Flip over it and shimmy forth until you're over the piping. Drop down onto it and walk forth it (watch not to slip on the bird 'stuff'), before climbing up the ledge on the right at the finish. Some other manner is to somersault across the bridge and put out the fire with your Coolant. That is how y'all become a suppressor for the AKS-74u. And then get on the ledge and caput round the side of the building on the ledge, simply sentry out every bit some sections of the walkway will collapse. One time you go round the corner flip over the rail and drop onto the span below.
L-G Connecting Bridge
Shoot the guards with a non-lethal weapon on the other department of the bridge and go along the walkway. Cartwheel over the first gap, then hang from the rail and shimmy by the second one. Climb the ladder at the end. Be careful of this. It is more than hard than it looks.
Strut 50, Perimeter
Head forth the walkway looking out for the loose sections and avoiding the guards looking through the windows. When you come to the collapsed section effectually the corner, crouch and hug the wall to become past it and under the obstacle. Circular the next corner a brusque cut-scene will prove a guard bursting for a slash. He then proceeds to take one over the side, then hug the wall to avoid the stream (zero happens if you lot walk through it, but you tin can call Colonel for a funny chat if the stream is hit you). Become round the corner and flip over the railing to get down to the bridge.
Thousand-50 Connecting Bridge
Pick up the AKS-74u AMMO then cross the bridge and pick upwards the RATION from the other cease. Go up the stairs, wait out for the Cyphers and pick up the PSG1 AMMO and Crust GRENADES from the doorway of STRUT K. Now utilise a Crust GRENADE to put the Cyphers temporarily out of activeness then go to the bridge leading to the Vanquish 2 Cadre. Cartwheel beyond the first gap, flip over the runway and shimmy past the second one (if you're hardcore, you tin cartwheel through this one too) and enter the door to get into the Core.
Shell 2 Core 1F, Air Purification Room
One time inside y'all'll see some cutting-scenes and Codec conversations. When you're in command again go downwards the stairs on the left and up again on the other side. Become up the corridor and into the room on the correct to discover the Node. Enter the elevator and ride it to B1.
Crush 2 Core B1, Filtration Chamber No. 1
Get out of the lift and log into the Node on the right. At present go down the stairs and into the h2o. Swim direct down to the stop of the corridor and catch the NIKITA and use the air pocket at the elevation if you demand to. At present swim dorsum and return to the elevator. Head back to 1F. ( It is also possible to detect the corpse of Peter Stillman floating in a room to the bottom correct of B1. )
Shell 2 Core 1F, Air Purification Room
Go down the corridor then downwardly the steps. Get up onto the container and fire a Nikita missile into the vent. Wing the missile through the vent and into the room where the President is. Exist careful non to hit him. Aim to destroy the transformer in the corner. This will turn off the electricity on the floor leading into the room with the President allowing you lot to enter. When you do a series of cutscenes will trigger which the President will fill y'all in on the events so far, he also gives you a LEVEL four CARD Cardinal and the MO DISC. Exit the room and watch another long, awesome cutting-scene. Once it's over return to the lift and ride it to B1.
Shell 2 Core B1, Filtration Chamber No. 1
Get back into the water and become swimming, taking the first right you lot come to. Take the second left, swim down the corridor and accept the next left. Apply any air pockets you come to. Go through the doorway on the right then become left, then correct again. Wait out for the mines here and open the door at the end. In this room, brand your way through the debris, using whatever air pockets yous need to. Be sure to stop at the 2d air pocket to get the PSG1-T. Open the door at the end. Go up the stairs and through the door for your next Boss fight confronting Vamp.
Dominate: VAMP
First things kickoff - don't fall in the water in the eye of the room or else you won't be coming support. Vamp himself moves around quite a lot and can be pretty hard to hitting. First of all, shoot all the four lights which are pointing to the surface area where y'all are walking, so Vamp can't catch you with his shadow knives. He will be in one of iii places - in the h2o, on your level or on the catwalk above. Deflect his knives by shooting them in FPV. When he's in the water you tin can try striking him with the RGB6 but it's not easy. You tin also hit the water with the STINGER weapon to drain his STAMINA and to get him come upward faster. When he's on your level, apply the NIKITA, STINGER or any other bullet-based guns. Utilize the aforementioned weapons if he'southward on the catwalk above as well. When Vamp glows red he can dodge bullet-based attacks then stick to rockets. His attacks mainly consist of throwing blades at yous but when he'south on your level he may charge at you and utilize his knife. He also has a freeze attack which can paralyze y'all for a few seconds, leaving you open to assault. Though he tin't use them if y'all have shot all the lights out. Stock up on ammo and RATIONS, contrivance his attacks the best you tin and yous'll eventually beat him. Or, y'all can beat him VERY EASILY, merely it tin be quite ho-hum. Establish a C4 by a railing, flip over the side and await. Vamp volition arroyo you lot and hunker, ready to assault. He should be right by the C4 so detonate it, bravado him into the h2o. Flip back onto the catwalk, establish another C4, flip back over and wait for him again. This method can take a while, just you lot won't become hit very much at all. You lot can besides institute ONE claymore on one side of the "puddle" (try non stepping on it) and then if Vamp attacks from that side, he goes to the water. Also, shoot from with the RGB6 the instant he comes from the water to your level. If y'all tin shoot a grenade into the "pool" first, and instantly knock Vamp off when coming out of the h2o, you lot volition bargain some serious damage. Information technology is really easier to defeat him with a stamina kill. All you have to practice is shoot him with the M9 when y'all can, and when he's on your level, do the punch-punch-kick-kick combo. It knocks off most a quarter of his stamina.
The easiest and fastest style to kill him is to lay down in the corner by the north door, wait for him to start walking towards you and guide a Nikita missile at his feet (and repeat.) Keep an centre on your radar. If washed correctly he will never go an assault on you and the battle will be over fairly quick.
Once the fight is over, you need to rescue Emma, so exit the room. Pick upward the RATION (flip over the northmost runway to get it) and go downwards the stairs into the water. Look out for the mines and swim right through the door then get immediately right again. Have the second left and option up the BODY ARMOUR then become back and right through the adjacent door to find a prepare of stairs leading out of the water. Go through the door at the acme and log into the Node. Choice upward the PENTAZEMIN so open the lockers to discover a BOOK, some C4 and Emma. Lookout the cutting-scene, then you accept to guide Emma back the way you came through the water - head for the room where you fought Vamp. When you lot go out of the water before the room where you fought Vamp printing and concord TRIANGLE to hold Emma'south paw and guide her. One time inside the room lookout man another cut-scene. Guide her out of the room and head back to the elevator. Emma can't hold her breath as long every bit you, and then be sure to stop at every air pocket to restore your O2 gauges. If Emma loses health then wait a while to let it restore.
Vanquish two Core 1F, Air Purification Room
Take out all the guards here and lead Emma back out to the bridge that you used to get into the Cadre.
K-L Connecting Bridge
Shoot the Cyphers so atomic number 82 Emma across the now repaired bridge. Get towards the flames and extinguish them using the COOLANT SPRAY. Now head to the door beyond where the flames were and watch the cut-scene in which Emma gives you a LEVEL 5 Bill of fare Central.
Strut 50, Sewage Treatment Facility
Option upwardly the SOCOM AMMO, and leave Emma hither for the next bit. Continue forward and take out the two guards. Now go dorsum and fetch Emma. Lead her through the other door (not the ane that yous simply came through) and yous will see some other cut-scene.
Strut Fifty, Oil Fence
Yous must now provide covering fire for Emma as she crosses the oil contend. Employ the PSG1, have some PENTAZEMIN and put on the THERMAL GOGGLES. Shoot the Claymores that are in her path, and then concentrate on taking out guards and Cyphers. Emma moves very slowly and information technology takes her a while to become across so exist patient. There are some PSG1-T bullets nearby and if you run low on ammo, then more volition appear. When Emma gets to the second fence Ophidian calls you up to say that he's in position to give covering fire. Call him up and he will say he will show you some 'existent sniping'. Whatsoever enemy you aim for (guard or Cypher), Snake will blast away at information technology, but help him if at that place are too many for him to handle. On the tertiary section of the debate are some more than Claymores, so take them out earlier Emma gets there or information technology's game over. When Emma gets almost halfway across the third fence a cut-scene starts and Vamp reappears. He holds Emma hostage and then you need to put a few bullets in his confront (it is easier to hit him if you aim for the right shoulder. It presents a much larger target the chest. If you found the place, you can shoot him well-nigh continuously if you aim there). Exist conscientious not to hit Emma. Pop some PENTAZEMIN and become shooting. One time he's expressionless, watch the cut-scene.
Strut Eastward, Material Distribution Facility
Once the cut-scene ends you'll exist back in Strut East with 300 seconds to get to Beat 1 Core, B2. Take the Digital Camera from the LEVEL 5 room and go upwardly the stairs. Option up the SOCOM AMMO so go through the door on the left. Go upwardly the stairs into the Bundle Room and use the door on the lesser correct to get out to the bridge.
East-F Connecting Bridge
Shoot the Cyphers then head over and into Cadre. Watch out for gaps in the bridge!
Vanquish 1 Cadre, 1F
Caput inside and turn on your MINE DETECTOR as some Claymores accept been laid. Go into the elevator and watch the cut-scene during which you'll be placed inside Arsenal Gear.
Arsenal Gear, Tummy
More lengthy cut-scenes during which Solidus will try to strangle yous. Press TRIANGLE/Y in rapid succession to concord your jiff and survive this torture. Somewhen you'll be released and then pick upwards the RATION from under the desk, open the locker to find some COLD MEDICINE so become through the door. Log into the Node then caput through the side by side door.
Arsenal Gear, Jejunum
The Colonel volition at present proceed calling you with increasingly foreign messages. Yous can ignore them but some are worth listening to for sheer comedy value. Brand your mode to the other end of this long room, fugitive guards as you go. Endeavor to exist undetected as the guards have the Tengu suits and have superhuman abilities and, since you lot are naked, you receive more damage from bullets. Go up the stairs at the stop, avoid the guards and cameras upward hither and then go downwardly the corridor on the correct and through the door at the end.
Arsenal Gear, Ascending Colon
In one case in here, answer every Codec call you lot receive until Rose calls, later on which there will be a cut-scene. Snake gives you all your equipment back plus the Loftier FREQUENCY Blade. You get to have a practice with it for a short while, just brand sure you don't slash Snake by fault (if you do, even so, Ophidian will shoot at you and call you a "moron"). When Snake starts shooting at you, y'all can practice deflecting bullets. As well, if you like, try knocking out Snake. In the instance that you lot do knock him out, pick up his trunk and driblet it numerous times. Eventually, he'll drop a dog tag. Simply take intendance non to kill him every bit this volition result in a game over. Subsequently a while, a cutting-scene volition start.
Arsenal Gear, Ileum
Y'all must make your way through this room while killing every i of the truck loads of guards, Snake will also help you. Use the M4 or AKS-74u and whenever you run out of ammo, Snake will give you more than. As well, put on the BODY ARMOUR to give you some more than protection. Use the various crates every bit cover and advance with Ophidian. At the cease, the 'ALERT' bar volition go down, later on which yous can go through the door (The Arsenal Tengu guards can reflect bullets with their swords. This is one of the best opportunities to use the sword that Snake gives you lot).
Arsenal Gear, Sigmoid Colon
Pick up the RATION and go through the doorway into the circular room. Watch the cutting-scene and kill the hoards of guards that surroundings you. While Ophidian blasts away at them, use your HIGH FREQUENCY BLADE to impale the soldiers, as it gives you more freedom of movement. At some point, the 'Mission Failed' screen will appear, simply information technology says 'Fission Mailed' instead. Don't worry you haven't died, only continue fighting using the small screen in the corner until it returns to normal. After a few minutes of hardcore fighting, a cut- scene volition ensue.
Arsenal Gear, Rectum
The cutting-scenes will go along here for a while until some Metal Gear RAYs arrive - this is your side by side Boss fight.
Boss: METAL GEAR RAYS
The only weapon you need here is the STINGER. You'll start against three Metallic Gears, which mainly burn rockets and car guns at you. Chuck a Chaff GRENADE every now and once again to scramble their radars and prevent them from using rockets confronting y'all. The best style to impale them is to shoot them in the leg outset, making them open their large, metal mouths. Fire a rocket into their mouth (be quick) to do some serious damage. Accept cover between a RAY's legs, so that no missile can hit yous, but be conscientious not getting hit by the water jet cutter. Whenever they try to stomp yous or jump near yous, do a flip to avoid damage. Impairment all three equally until ane jumps into the centre, where you lot can finish it off. Do non waste stingers on any RAY you have already eliminated. Another will then jump into the center. Avert it's feet as it can stamp on you and kill you. Since you've already damaged it, information technology won't take too much to destroy it. When one is destroyed, another will appear and take information technology's place. If you run low on RATIONS and AMMO, more will appear in the centre as the fight progresses. Once you've destroyed the required number (3 on Very Easy/Easy, 6 on Normal, 12 on Hard, 20 on Extreme/European Extreme), another cut-scene volition showtime.
After you impale RAY Olga will come up and attempt to protect y'all then she gets the torture session only more action after this gruesome death scene this volition happen...
You'll take to survive some other torture session from Solidus, so tap TRIANGLE repeatedly to agree you breath. If yous have a Turbo controller, now's the time to employ it. This method does not work on extreme or hard and so try it. I just utilise torso armor so just dodge the attacks and hit them with the Stinger. That's the best way to practise it.
Federal Hall
After yet another cut-scene you lot'll end up here.
FINAL BOSS: SOLIDUS Ophidian
This is the concluding battle and all you can use is the High Frequency Bract (If used in not lethal way, the HF Bract deals the proportional damage every bit if used lethally). Solidus is very good at blocking and virtually of the time it's tough to striking him. The best thing to do is dial and kick him, then slash him a couple of times while he'due south off balance. Whenever you block or avoid his attacks, slash him every bit much as you lot tin. The cartwheel tin can also exist effective, so use that equally often every bit you can. He has some nasty attacks that yous'll want to avoid - he slides beyond the ground, leaving a trail of fire equally he goes (cartwheel if yous catch fire), he uses his tentacle arms to strangle you lot (press TRIANGLE equally usual, you can also try rotating R3 as fast as you tin can to struggle loose which also leaves Solidus open for an assail). He also jumps up, grabs the wall and launches himself back down on top of you, and fires missiles from his tentacles which, fortunately for y'all, can be easily avoided. When Solidus fires the missiles from his tentacles, keep a bit of distance until he fires his 3rd missile, so cartwheel next to him avoiding the 4th missile and you can easily strike him with your bract and every bit soon equally he falls gain some distance and echo the process. At some bespeak during the fight Solidus volition discard his tentacle arms and offset charging across the roof. There is a RATION in the top corner if y'all need it. Be careful not to fall off the roof - Raiden will sometimes hold on, merely non e'er. Once he's defeated, watch the Actually long cut-scenes.